If you take a look at gardening on Pinterest or Instagram, your screen would fill with gorgeous, perfectly manicured gardens. Raised beds made with cedar, gravel walk ways, arches and fancy greenhouses. It’s so beautiful…. but you can’t afford to garden like that. You are trying to garden to save money not spend it all in one shot. The pretty stuff can come later ;). So, how do you start a garden for less than $50? Can you even do that if you’re starting with bad soil?
Choosing a place for your vegetable garden
Let’s start with the first question posed in the introduction. How to start a garden for less than $50.
If you are starting a veggie patch, locate an area on your property that has decent sunlight and doesn’t get too soggy when it rains. Don’t worry if your location is not perfect! My last garden was just barely above a swamp, but over time with the continuous addition of carbon/mulch it no longer flooded during heavy rains. And if your property doesn’t get much light, don’t let that hold you back either. My first garden only got direct sun for two to three hours a day and I still managed to grow some sun loving tomatoes :D.
Moral of the story, choose the best location you’ve got, but don’t fret if it isn’t 100% ideal.
How to set up your garden bed
Now that you’ve chosen your spot, it’s time to gather some supplies. Plain cardboard, mulch of some kind, compost, and of course seeds.
Lay out the cardboard in the size of your garden bed. I love 4′ wide beds, but choose whatever size you’d like. The 4 foot width allows for easy reach into the middle of the bed from either side. The length can vary depending on your preferred layout. We make ours as long as the space allows.
Now that the carboard is laid out, you have two options. Either you can spread out your carbon/mulch first or you can layer down some compost or garden soil.


Topping off with mulch first
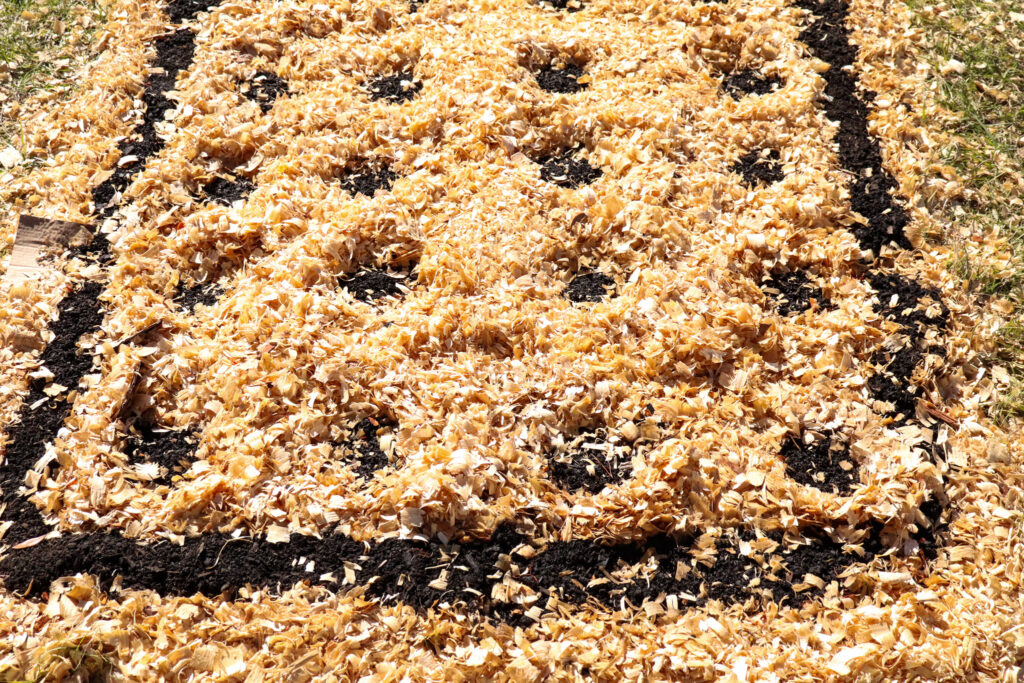
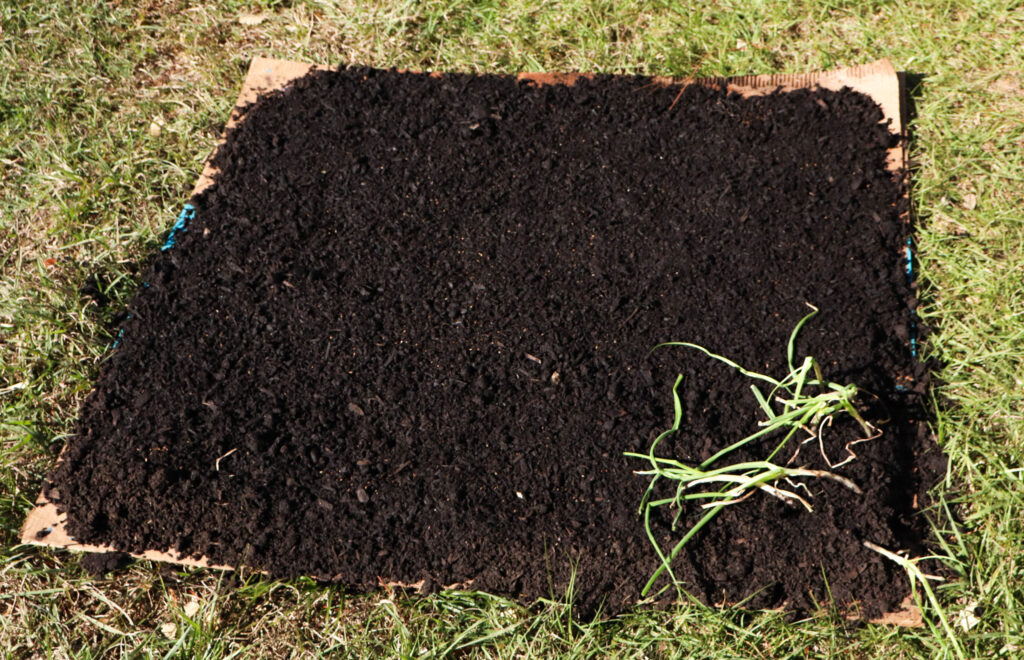
The mulch first approach is the cheapest option. Mulches, wood shavings, pine needles, fall leaves, fine wood chips, etc. are much cheaper to come by, a lot can be gathered for free. They also go further than a bag of compost from the store. A lot further. In the above images, one bag of compost didn’t even cover the whole cardboard. Whereas the mulch first method allowed me to use less than 3 bags of compost to sow a 4’x20′ bed.
So, if you are especially pinched for cash, do the mulch first method. Just know that this method will be a little more time consuming when we go to add our compost and seeds.
After completely covering the cardboard with several inches of mulch, go ahead and soak it down with some water. This will hold the mulch in place and aid in its decomposition. Over time this whole bed will turn into a rich soil teeming with life.
After the mulch it’s time to add the compost and seeds. You can really stretch your compost/garden soil if you only apply it where you want to sow seeds. Pull back the mulch and fill the spot with compost, then add a few seeds of choice and move on to the next spot. Continue this pattern until the whole bed is planted.
Topping off with compost first
Compost first is a great option if you have an abundance of compost, or some extra cash. You will easily save time using the compost first method when making your garden bed. However, it does cost quite a bit more if you are unable to make compost yourself. If compost is free for you in your area then by all means use it. This can sometimes be the case if your local trash collectors make compost as part of their waste management system.
Cover your cardboard with several inches of compost/garden soil. Then cover the entire thing with mulch. Wood shavings are a great option but any type of carbonaceous material will do. Think fall leaves, pine needles, fine woodchips, even dried grass clippings can be used if that’s what you have, although the seeds in those might cause some headache down the road.
Pull back the mulch to plant seeds where you’d like and water the whole bed thoroughly.
How to start a garden inground when the soil is… awful.
This instant garden won’t be the healthiest, most productive garden right off the bat if you are starting with dead soil underneath. A lot of us Floridians are working with sandy soil without nary an earthworm to be found.
The good news is that by cultivating your own garden, even if it’s only 4’x8′, you will over time be adding more and more organic matter to the soil. You will be growing plants that produce foliage and roots. Those plants will die at some point and that can, and should be returned to the soil. Wither you decide to compost in a large pile away from the garden bed, or if you chop the plants and let them decompose right where they grew, whatever you choose don’t throw away organic matter! Hoard it 😀
Over time, your dead soil will be bursting with life! Continue to add mulch and compost to your garden as needed. Pair that with a diverse group of crops and flowers and you will turn your backyard into an oasis for beneficial insects and animals. All of that can be yours with just a little bit of tender loving care. And, it will be beautiful. Even if it’s not a Pinterest look alike 😉
How to start a garden that makes the most of a small space
This could probably be a post all it’s own but for here I’ll write down some key notes for small space gardeners.
Stack your plantings.
A lot of plants need a certain space between each other. For example a good role of thumb is to space tomato plants about eighteen inches apart. But what could be grown underneath the tomato, that won’t hinder it’s growth or compete with it too much? Eighteen inches is a good amount of space after all.
Plant low growing things under high growing things. But, what about sunlight? Don’t most veggies need full sun? Don’t worry! Plenty of things will do phenomenally in dappled shade. Brassica’s flourish in the understory of taller plants. Especially when the weather starts to warm up in the spring and early summer. Herbs and other leafy greens don’t need massive amounts of sunlight.
The very edges of your bed offer a great opportunity for flowers to bring in beneficial insects, deter bad ones, or even attract bad insects away from your crops.
Succession sow.
You should have a general idea when a plant is ready for harvest. Before that time comes, think about what you want growing in that spot next. If the weather allows in your area, sow the next seeds underneath the maturing plants. By the time your mature crop is harvested and removed, the seeds will have sprouted.
Alternatively, you can also sow seeds in trays before the older crop is gone so that they are ready to transplant the moment the crop is removed.
Unless you were growing a root vegetable, cut the harvested plants at the base, leaving the roots in the ground so that they can decompose and build your soil.
How to source your seeds
Again, this is a pretty hefty topic, but let’s keep it simple. Buy seeds that are heirloom, also called open pollinated. These crops will produce seeds that will grow true to type for generations. Some crops are easier to cross pollinate then others which could result in a different vegetable then you were expecting. A self pollinating plant does not easily cross pollinate with another variety. Wind pollinated crops, like corn, need to have a significant distance between other varieties to ensure you harvest what you wanted. When you are learning how to start a garden, the seeds packets will become treasured information resources.
My favorite company to buy from is Baker’s Creek. They are pricier then some but the quality of seeds and the variety they offer makes it worth it to me. They also offer free shipping and sample packs to go with your orders. Who doesn’t love free seeds??
Gardening is one of life’s greatest pleasures. I hope this post gave you enough inspiration and how to’s to get started.
If you have any questions about how to start a garden, let me know in the comments below! I’d love to help anyway I can 😀
If you found this helpful at all, check out some of my other posts on gardening. And if you live in Florida check out my free garden guide eBook!

Leave a Reply