
‘Tis the season for peach cobbler, peaches and cream, peach crisp…. Goodness, gracious peaches everywhere on everything 😀 This recipe uses three simple ingredients, peaches, sugar, and lemon juice. If you, too, love peaches and want to continue enjoying them long past peach season, then you’ll love making your own peach preserves (peach jam).

How to make peach preserves
First off, source your peaches. Buying in bulk is always going to be more affordable than buying a little here and there. Buy local if you can. Growing your own peaches is also a great option as they aren’t huge trees and can be pruned to a manageable height for a suburban yard.
Select peaches for your jam that are slightly under ripe. These peaches will contain more naturally occurring pectin than the fully ripe peaches. Since peaches are naturally low in pectin to begin with, using slightly unripe peaches will be very helpful here. Save the ripe ones for fresh eating and baking, or use them to can up some whole or sliced peaches for later.
Prepping your peaches
Before we get started with the jam, we will need to blanch our peaches. Do this by washing your peaches and cutting an “x” in the bottom of every peach.
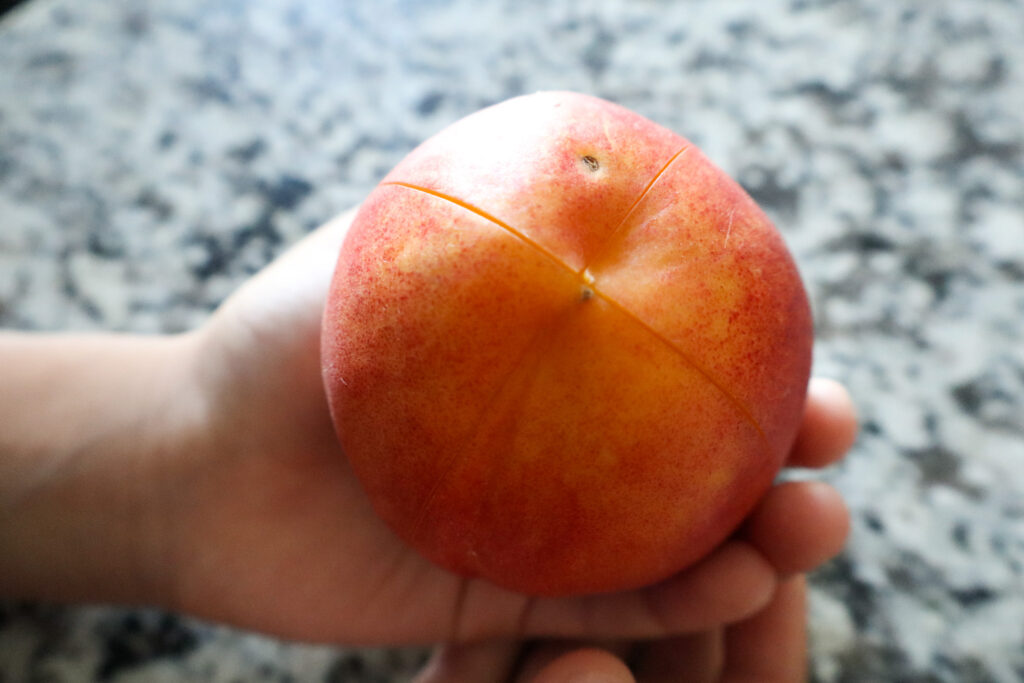
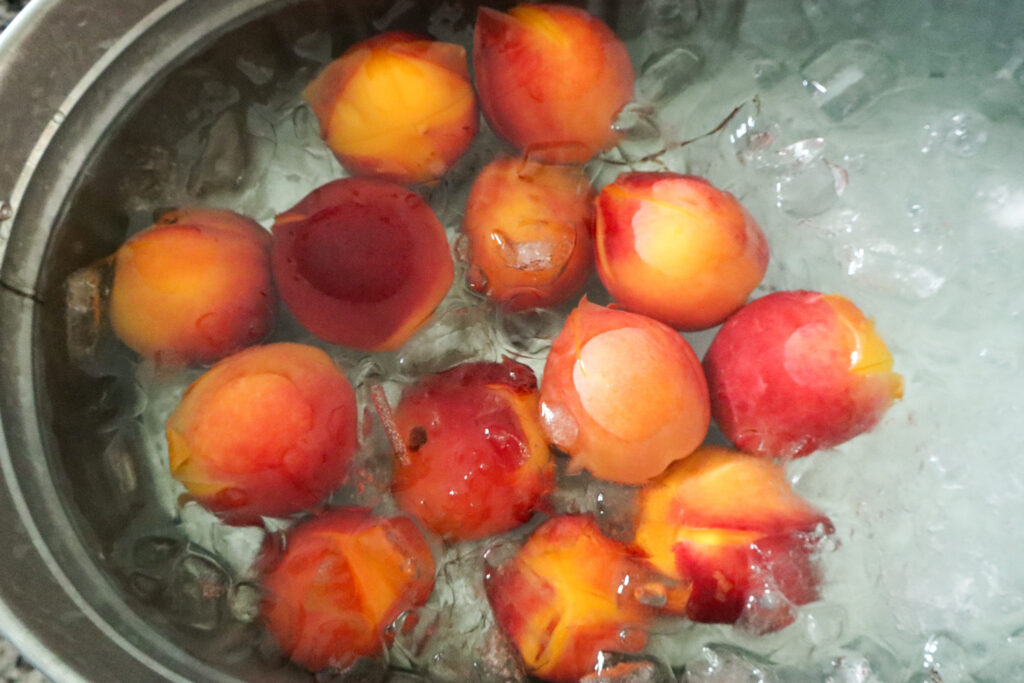
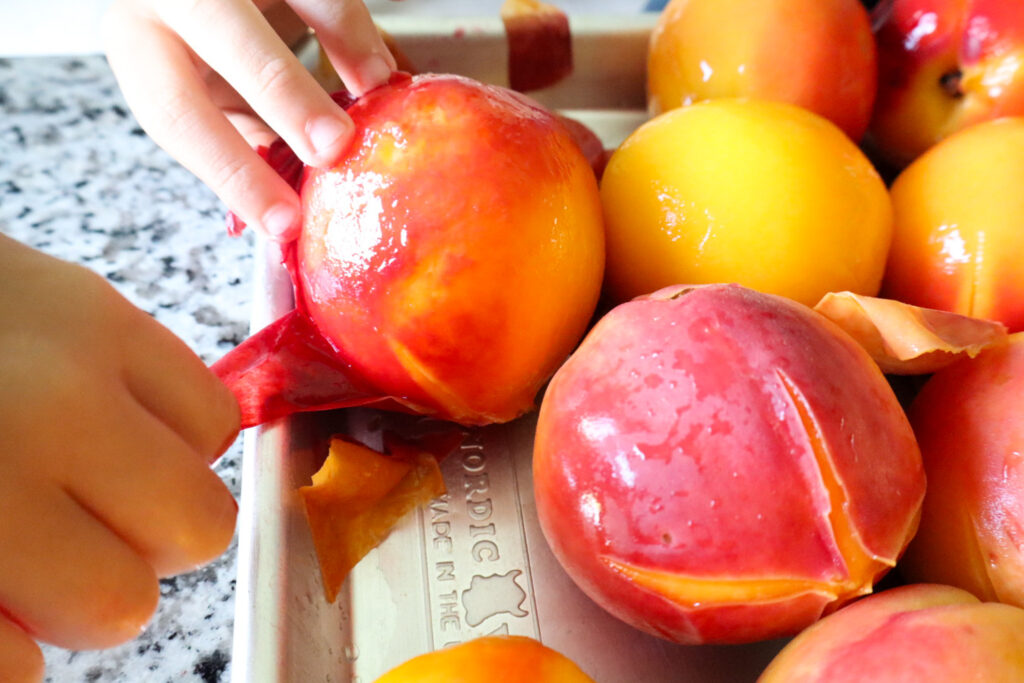
In a large pot, bring water to a boil. Once boiling, add peaches and cook for 30-60 seconds. Remove the peaches from the pot and immediately place in icy water. Once the peaches have cooled off enough to handle, peel peaches and remove the pits. I cut mine into slices to separate the pits.
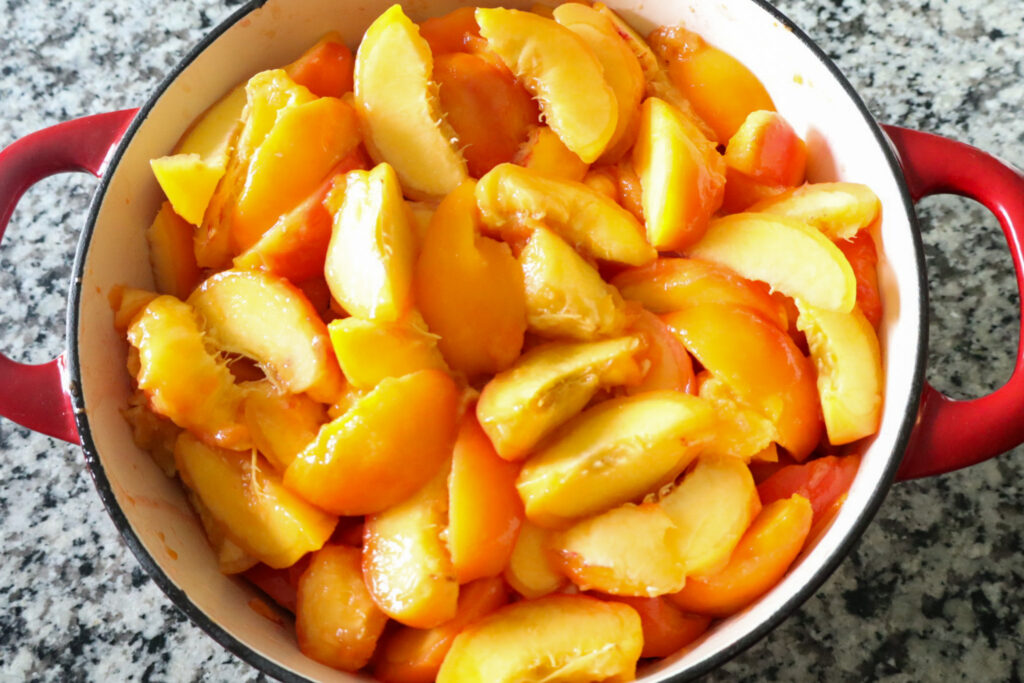
Next, mash the peaches. If you like your jam like a true, chunky peach preserve, then use a potato masher. This will be easier to do after the peaches have cooked for a couple minutes. If you prefer a smooth jam, and immersion blender will do the trick.

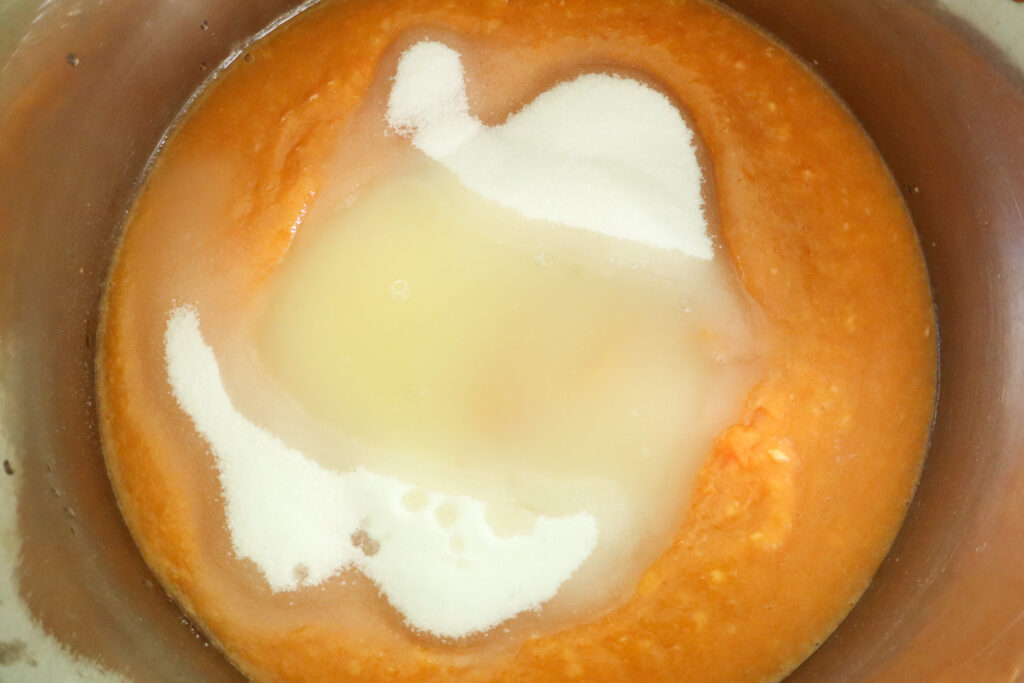
Add the lemon juice and sugar. Cook over medium heat, stirring occasionally until the jam reaches gel or thickens to your liking.
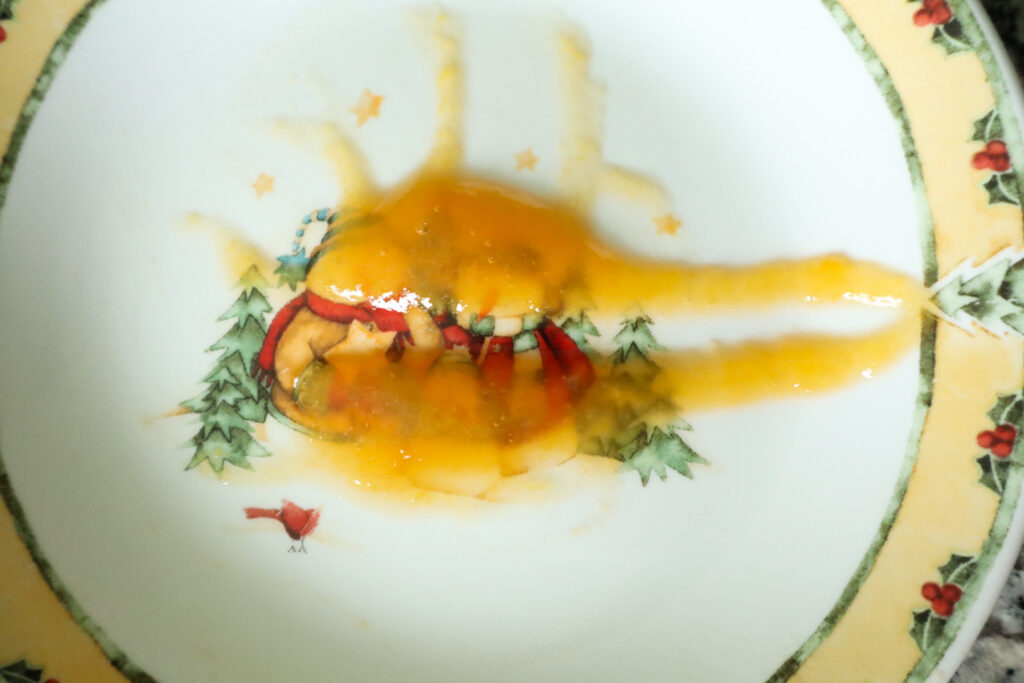
To test for gel phase, place a plate into the freezer for a few minutes. Place a dollop of the peach mixture onto the chilled plate. Allow the peach preserves to cool to room temperature, then run your finger through the middle of the dollop. If the jam stays separated, it’s ready to can. If it runs back into each other, cook it a little bit longer.
Don’t judge the Christmas plates, they do the job 😂
Canning your homemade peach preserves
Prep your jars by washing them, lids, and rings in warm soapy water. I like to can my jam in pints, since we tend to go through them quickly. But if your family don’t use as much at once, half pint jars will be perfect.
Allow them to air dry before proceeding.
Next, you’ll need to warm your jars in preparation to receive the hot jam. If your water bath canner comes with a rack, place your jars in the rack to warm with the water below them. You can also place the jars in the water directly and warm the water and jars together.
Using a jar funnel, fill the warm jars with the hot peach preserves leaving a 1/4″ headspace. Using a butter knife, remove any air bubbles in the jars.
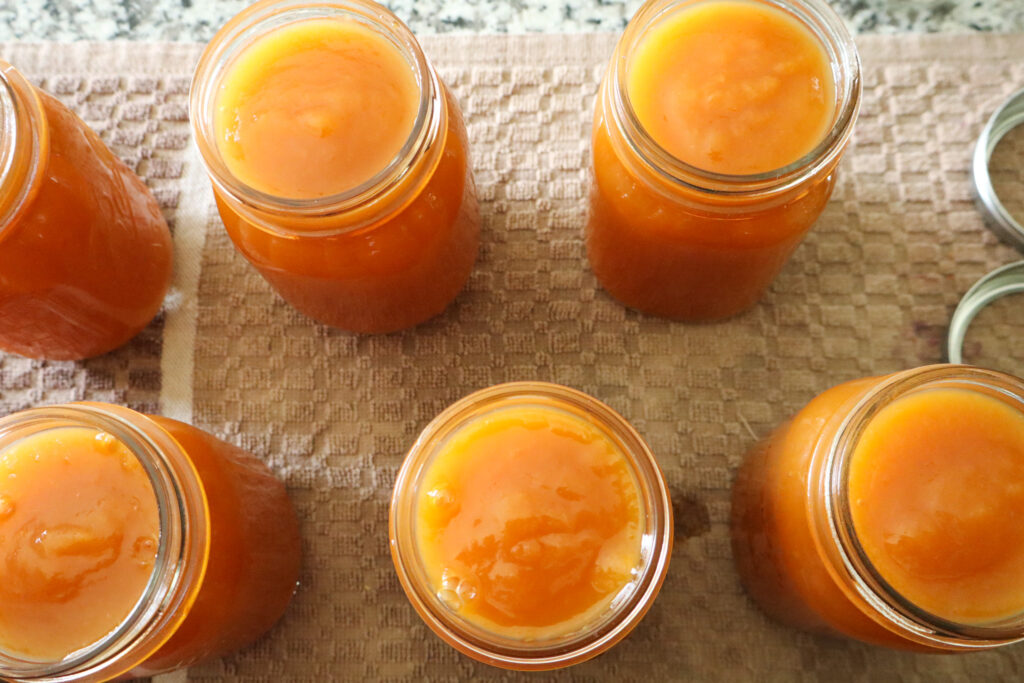
Wipe the rims clean using a damp rag. I like to dampen one corner with white vinegar and use that to clean the rims of the jar.
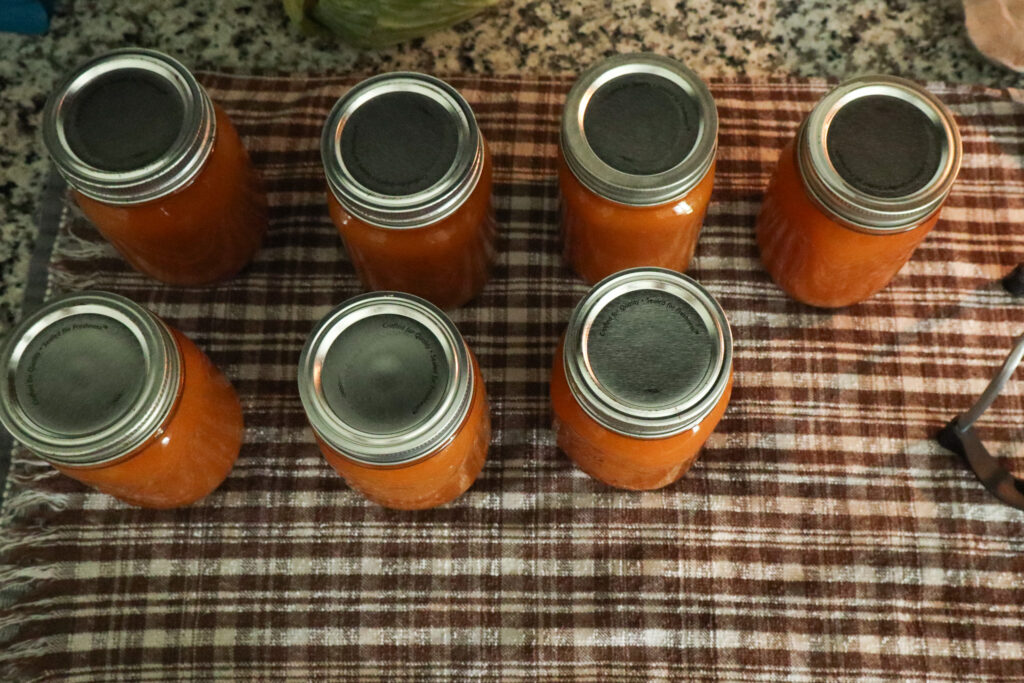
Top the jars with lids and rings, tightening to finger tip tightness. Just turn the rings until you feel resistance, and then give one more little turn.
Place the jars onto the rack in your water bath canner, and lower jars into the water. Ensure there is at least one inch of water over the tops of the jars. Place the lid on the pot and bring the water to a rolling boil. When that starts, set your timer for 10 minutes for half pints or 15 minutes for pint jars.
Don’t have a water bath canner? Don’t worry you don’t need one! A large stockpot with a lid and dish towel will do the job. You just need to make sure the water fully covers the jars with a least an inch of water over the top. Place the dish towel on the bottom of the pot to keep your jars from being in direct contact with the bottom of the pot.

When the cook time is up, turn off the heat and remove the lid from the pot. Allow the jars to rest for five minutes before carefully removing the jars with a jar lifter.
Place the hot jars onto a towel on the counter. Somewhere they will be safe and undisturbed for the next 12-24 hours.
The next day remove the rings and check the seals on the jars. If you have any jars that didn’t seal, just use those up first. I like to keep our jam in the fridge once it’s been unsealed.
Wash the jars (they may be a bit sticky), label them and add them to your pantry.

Peach Preserves (Jam)
Equipment
- immersion blender or potato masher
- water bath canner or large stock pot if you don't have a water bath canner, a large stock pot with a folded dish towel on the bottom will do the job.
- canning jars (half pints or pints), lids and rings this recipe yielded me 7 pints, however that will vary depending on how long you cook the jam and the amount of pectin in your peaches.
Ingredients
- 10 lbs peaches slightly under ripe
- 4 cups sugar
- 1 1/2 lemons, juiced
Instructions
Blanch the peaches
- Place a large pot of water to boil and prepare a large bowl with cold, icy water.
- Cut an "x" into the bottom of each peach. Place peaches into the pot of boiling water and cook for 30-60 seconds. Remove them from the pot and place into the bowl of cold icy water.
- Once the peaches have cooled enough to handle comfortably, peel and pit the peaches.
Making the jam
- Place peeled and pitted peaches into a large pot. Using an immersion blender or potato masher, crush peaches to the desired smoothness/chunkiness.
- Add sugar and lemon juice to the peaches and stir until well incorporated. Cook over medium heat, stirring occasionally until the peach mixture reaches "gel". This can take a couple of hours.
Canning the jam
- Prep your jars, lids and rings by washing them with warm soapy water. Allow them to air dry before moving on to the next step.
- Place clean jars into warm water, or place them in a rack over the water in your water bath canner. Allow them to warm with the water in your canner.
- Funnel hot jam into the hot jars leaving a 1/4" headspace. Dip the corner of a dish cloth in white vinegar and wipe the rims of each jar clean.
- Add lids and rings, tightening each to fingertip tightness.
- Place jars in the water bath canner or stockpot*, ensuring at least one inch of water above the top of the jars. Place the lid on the pot and bring to a boil.
- Once a rolling boil is established, process half pint jars for 10 minutes or pint jars for 15 minutes.
- Remove the pot lid and allow the jars to rest for five minutes before removing the jars.
- Carefully lift the jars out of the pot and place them on a towel on the counter. Leave them undisturbed for 12-24 hours. They may pop as they seal which is great! Don't worry if you don't hear popping, though.
- After the 12-24 hours are up, remove the rings and check the seals. Clean the outside of the jars and label. Any jars that did not seal can be stored in the fridge and used up first.
Peach jam is one of my favorite! Thanks for sharing this recipe, it brought me back to my childhood making jams with my aunt 🙂