
If you’re anything like us, then you love dinner rolls. They are so much more then a side dish. They can be used as slider buns, to make sandwiches, or dip them in your favorite sauce. These dinner rolls are made using my yogurt all purpose bread dough recipe, which saves me a bunch of time in the kitchen. The rolls are also super soft making them a great roll for those with chewing issues.
What you’ll need to make all purpose bread dough dinner rolls
First off, whip yourself up some dough. If you’re using my yogurt bread dough recipe, you don’t even have to knead! The yogurt in the dough softens the bread without kneading. So, if you don’t have a mixer it’s still an easy and efficient bread recipe. Kneading will give the dough a nice shape and smooth look, but it’s not necessary. So, do whatever you wish with it.
You can also adjust the amount of honey the recipe call for if you don’t wish for your dinner rolls to be sweet. 1/4 cup of honey is perfect for a more savory roll. We love taking the rolls, cutting them in half and topping with garlic butter and parmesan. We broil them for a few minutes and voila! Soft garlic bread 😉
You’ll also need some softened butter and a baking dish. We use a large cookie sheet more often then not. But you could also use a pie tin, cast iron skillet, casserole dish, or even a cake tin. Whatever you have that’s oven safe will work.
Making your dinner rolls

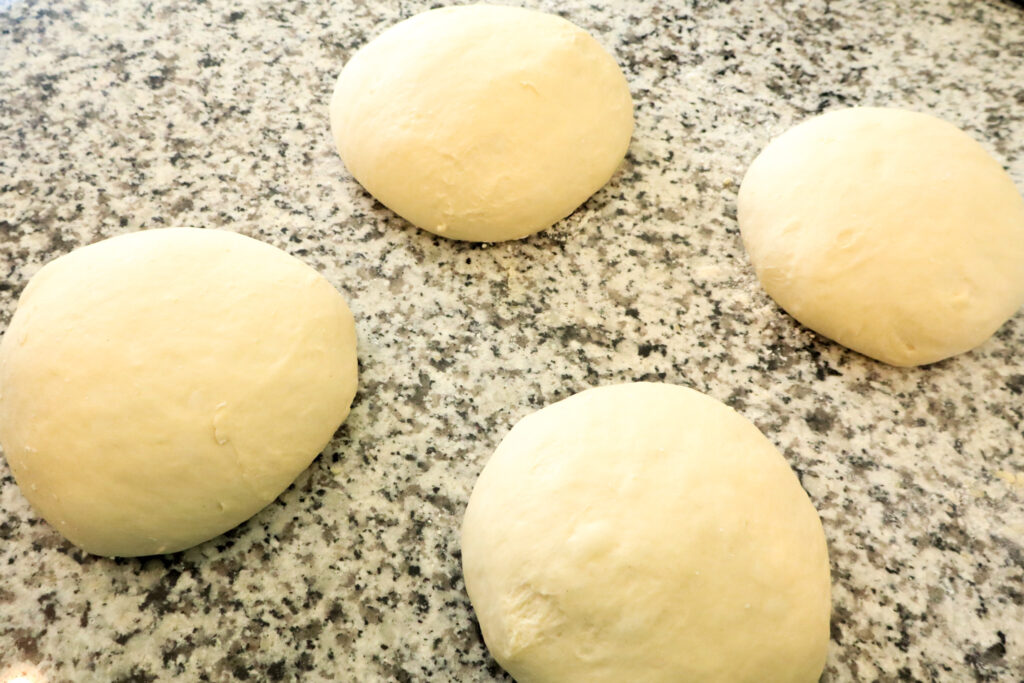
Once you’ve made up your dough and it’s finished rising, divide the dough into four parts if you did the whole recipe, or two part if you only did half the recipe. Take one part and divide it into 12 pieces. I like to take one portion, shape it into a circle and cut it into quarters. Then, I take each quarter and roll it out a bit to form a short, fat log and cut three pieces out of it. This helps me get more or less even rolls without having to weigh the dough out.
Now, you have two options here. You can lightly dust your hands and a work surface with flour while shaping the dough, or you can use butter. My son actually gave me the idea for buttering my hands when working with these dinner rolls. The dough becomes smoother and more elastic with the butter. Plus, who doesn’t enjoy a buttery roll?
To shape the dough, take it in your hand and gently fold the edges to the middle until the top is tight and smooth. Pinch together the bottom and place right side up in your baking dish.
You can line your baking dish with parchment paper, or simply butter the whole thing before adding the rolls.
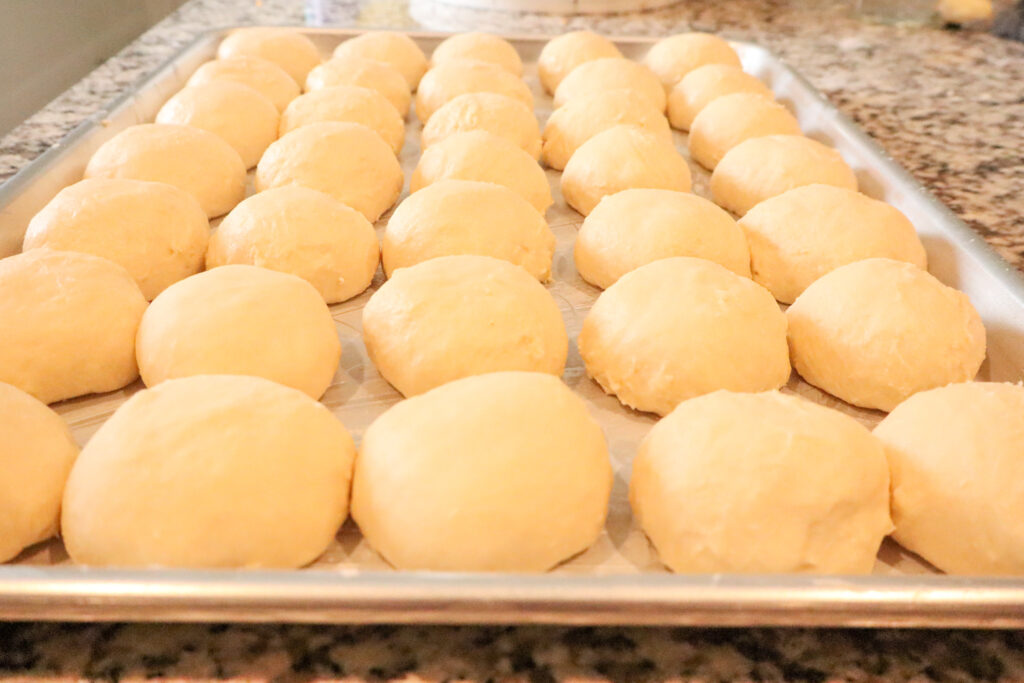

Shape all your rolls and cover them for a few minutes while you wait for the oven to heat up. You could also preheat the oven before hand so you can pop your rolls in as soon as you are done shaping them. That works great and we do that fairly often. However, it’s always nice, if you have the time, to allow the buns to puff up a bit before they go in the oven. This gives them a lighter texture, whereas the other method makes them denser.
Whatever you end up doing, know that both methods will still produce a super soft roll.
Baking your dinner rolls
We will be baking these rolls at 400°F. The time will vary depending on how many rolls you end up making. A dozen rolls will cook for about 15 minutes while two dozen or more will need at least 25 minutes before they’ll be finished.
If you are unsure how long to cook your rolls, say you turned an entire batch of bread dough into buns, then start at 25 and go from there. If you are experimenting making buns with another recipe, start at fifteen minutes and see how that does.
You want your rolls to be golden brown with an internal temperature of 190°F. When they are done cooking, brush butter over the top. Serve them warm with even more butter or some jam.

Leftovers can be stored in a plastic bag and can even be frozen for later use. To reheat frozen bread in the oven, cover the bread in tin foil and place in the oven at 250°F. Allow them to warm up for about 30 minutes before checking them. Frozen bread warmed up in the oven tastes just as fresh as the day you made it, leaving your dinner guests in awe of your culinary skills and kitchen management.
We almost always make two dozen at a time because of how versatile these rolls are. They make a perfect snack with some tea, or a fast lunch or dinner when paired with leftover meat, sandwich meat, or just plain old peanut butter and jelly.
Let me know if you gives these a try. I hope you all love them as much as we do! And of course, if you have any questions, let me know 🙂
Happy Baking! 😀

Dinner Rolls Using All Purpose Bread Dough
These dinner rolls are super soft and delicious. Made with an all purpose bread dough for even more efficient time management in the kitchen 😀
Ingredients
- 1 portion of all purpose bread dough, (can use more than one portion if more rolls are desired.)
- Approximately 1/2 cup softened butter
Instructions
- Make bread dough and allow to rise for one hour or until doubled in size. Divide the dough into four parts, if you made the whole recipe, or two parts if you halved it.
- Prepare a baking dish for the rolls. You can use a baking sheet, cast iron pan, cake tin, pie tin, or casserole dish. Use what you have so long as it is oven safe.
- Take one portion and divide it into 12 parts.
- Grease your hands with butter and shape each piece into a ball. Take the outer edges of the dough and bring them together underneath the ball. Pinch the bottom together and place dough onto prepared baking sheet, tin, pan, or casserole dish. Continue until all the rolls are shaped.
- Cover the uncooked rolls, and preheat the oven to 400°F.
- Bake for 15-20 minutes or until the rolls are golden brown and cooked through. The internal temperature should reach 190°F.
- Store leftovers in an air tight container, bread box, plastic bag, or beeswax wrap, for about five days at room temperature. You can also freeze the rolls for later use.
Notes
We like our buns a little less sweet then the recipe calls for. We like to use 1/4 cup of honey when we plan on making buns.
To divide the dough into 12 equal parts, without weighing them, I like to first shape the dough into a circle and cut it into quarters. Then I'll roll out each quarter into a short, fat log, and cut it into thirds. This yields 12 portions that or more or less equal in size.
When shaping the dough you can also opt to dust your hands and work surface with flour. This works well enough, but where the dough is sticky to begin with it can lead to the temptation to add more flour than needed. More flour will lead to a denser bread. So, instead we like to use butter. It gives the dough more elasticity during the shaping process and results in a smooth finish. Plus, who doesn't love a buttery bun.
If you are baking more than a dozen buns, start your cook time at 20 minutes and go from there. We usually bake two dozen at a time and find that they finish baking around 25 minutes in our oven.
Reheating instructions:
Reheating from frozen - Wrap rolls in tin foil, or place rolls on tray and cover tray with tin foil. Bake in the oven at 250°F started at 30 minutes. You may need more than 30 minutes if you are defrosting a bunch of rolls, or less than 30 if you're only reheating a few.
Reheating from chilled - wrap rolls in tin foil and place rolls in the oven at 275°F. Check the rolls after 15 minutes.
Enjoy!
Leave a Reply