
This chocolate swirl avocado and tallow cold process soap recipe is probably my favorite soap recipe I’ve created so far. It has a bubbly, creamy lather that leaves your skin feeling clean without being drying. It uses seven simple ingredients and it’s perfect for the beginner soap maker. If you’d like to make this recipe even simpler, omit the chocolate swirl and just make a solid white bar soap 🙂
If you have never made soap before, check out this post before you get started. Working with soap can be a bit dangerous if you don’t know what you’re doing. Once you’ve read through that post meet me back here.

This post may contain affiliate links. As an Amazon Associate, I earn from qualifying purchases.
What You’ll Need To Make Chocolate Swirl Tallow Soap
Equipment
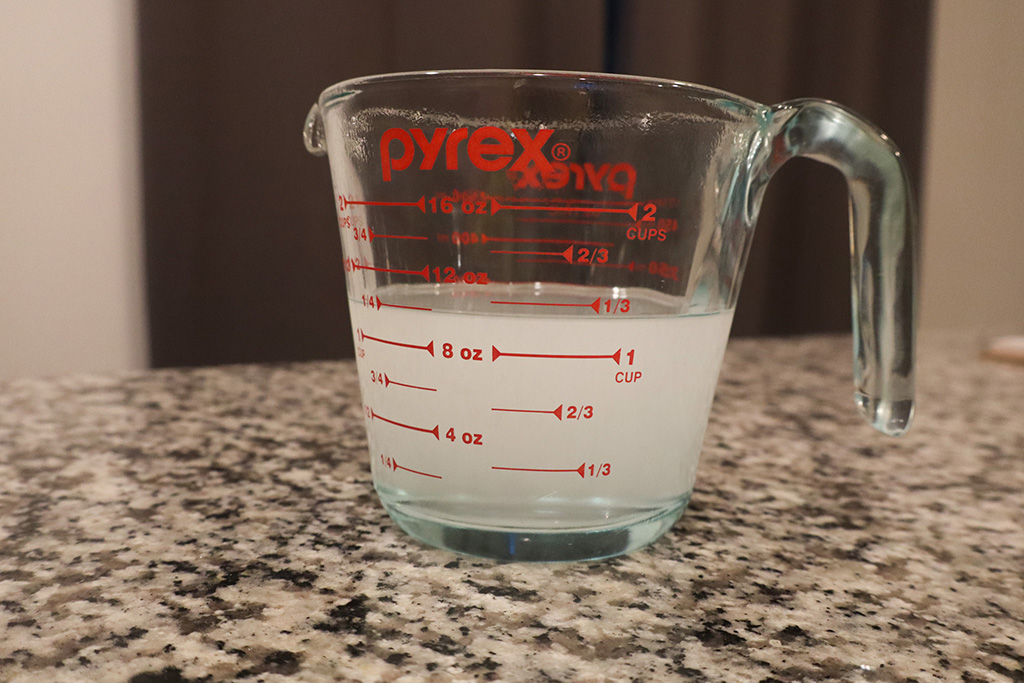
- Bowls – you’ll want one bowl per oil/fat, lye and water. To keep our measurements as accurate as possible, we will be weighing everything out individually before combining them and making our soap. You’ll want a stainless steel bowl, heat proof glass bowl, or thick plastic container when making the lye solution and mixing our soap batter. Then you’ll need one more bowl to divide the dough batter into two parts, the white base and the chocolate swirl. I really like these long spouted measuring cups for mixing together the colored soap.
- Digital Scale – when making soap you need to be precise. Weighing out all of the needed ingredients is essential to safe soap making.
- Immersion blender – this is technically optional. However, it can take up to two hours of vigorous whisking to get your soap batter to trace. Using an immersion blender gets you to trace in a matter of minutes.
- Loaf mold – this recipe is designed to fill one 42oz loaf mold. However, you can use whatever mold you have on hand, even a parchment paper lined glass bread pan (not aluminum!)
- Infrared or meat thermometer – we will need to monitor the temperature of our soap as we make it.
- Stainless steel whisk
- Stainless Steel wire mesh strainer – for sifting in our cocoa powder
Then you’ll need some basic safety equipment
- Rubber gloves
- Eye goggles – you are not going to impress anyone while you are making soap 😂 But these are really important. Lye is a caustic chemical that can cause serious damage to your eye’s if it splashes on them. Trust me, splashes are inevitable!
- Wear long sleeves, closed toed shoes or simply socks, and an apron. Keep your skin safe!
Chocolate Swirl Tallow Soap Ingredients

Tallow
This makes up 50% of the total fat content in this soap bar. Grass fed and finished beef tallow is a nutrition powerhouse for our skin and hair. It also makes for a good cooking fat 🙂 You can render your own from suet if you have access to it. Otherwise, you can buy prerendered tallow which works just as well.
This recipe uses tallow from cows. If you have tallow from sheep, deer or bison, you’ll need to run the recipe through a lye calculator. These tallow’s have different SAP values, so they’ll need different amounts of lye mixed in to turn into soap. I use soapcalc.net.
We’ll need 453g.
Avocado Oil
I love working with avocado oil in my soaps. It makes the bars so creamy and soothing for the skin. For whatever reason, tallow can be very drying on some skin types. Adding avocado oil really balances out this soap bar.
This recipe uses 181g.
Coconut Oil
This gives our soap some cleansing power and bigger bubbles. Coconut oil is high in lauric acid which is highly cleansing. In fact, if used in excess or without a sufficient super fat, coconut oil in soap can dry out your skin and hair. That highly cleansing lauric acid makes a great DIY dish soap bar. But, combine it with our very soothing, highly moisturizing fats, it produces a bar that makes beautifully bubbly soap.
We’re going to use 170g or 6oz
Castor Oil
This is another deeply moisturizing oil high in ricinoleic acid. In fact, it’s one of the only oils we soapers can get our hands on that contains ricinoleic acid. This fatty acid moisturizes, is antimicrobial and anti inflammatory. If you have damaged hair and dry, irritated skin, castor oil is an ingredient you need to have on hand.
It also imparts a lovely luxurious lather to your soap 😀
We will need 170g or 6 oz
Distilled water
If you have a source of soft water then you can use that in place of the distilled water. You can also use hard water if you’d like, but it will shorten the life span of your soap bars due to the minerals in the water. You can counteract this by adding some citric acid, however, if you’re a new soaper I would simply use distilled water. It’s cheap.
For this recipe we will need 224g or 8oz
Lye – NaOH
If you are going to make soap from scratch, you need lye. By adding the lye to our fats, a chemical reaction occurs that produces soap. You really don’t need to fear working with lye. Give it it’s due respect and you will be just fine and produce bars of soap that nourish and cleanse your family.
Cocoa Powder
This gives us a beautiful dark brown color to swirl into our soap. Unfortunately it doesn’t make the soap smell like chocolate, but it does give us lovely bubbles and some gentle exfoliation. This recipe will use 1tbsp but you can add as much or little as you’d like to reach the color you are going for.
How to make this chocolate swirl tallow soap recipe
Before beginning, ensure that all distractions are put away. Make sure that kids and pets are put away for their protection! If making soap during the day, only make it if another adult is able to watch the kids. Otherwise, waiting until after they are in bed for the night is a great option.
Weigh out ingredients
Our first step is to weigh out all of our ingredients. I like to weigh out my fats first, then the water, and finally the lye.
This way I can make my lye solution immediately. Lye is hygroscopic, meaning it’ll attract water from the air. Living in a humid climate means that the lye can get clumpy and that will affect the accuracy of our measurements. That can potentially lead to lye that’s not as efficient at turning fats into soap.
So, to ensure the purity of my lye, I do not leave it exposed to the air any longer than absolutely necessary.
Make your lye solution
Now that everything is weighed out, make your lye solution. Always add lye to water, never the other way around. Say this to yourself over and over to really nail this down, “snow falls on the lake”. Stir the lye water until the lye has fully dissolved.
It will get hot! Be careful not to inhale the fumes it produces at this time.
With that all done, set the lye solution aside in a safe place. While the solution cools it will go from cloudy to clear.
Combine the oils and fats

Add the oils/fats to a stainless steel pot/bowl. Melt the oils over medium low heat until everything is liquid. At this point check the temperature of your oils and lye solution. Our goal is to bring them within ten degrees or so of each other.
When working with lots of saturated fats, a higher temperature is ideal. Around 120-140 will be great. For the batch pictured below I combined the fats at 124F while the lye solution was 134F. If they are over 140F, let them cool off for a while longer before continuing.
Add lye solution to oils/fats

Gently pour the lye solution into the melted oils. You can pour over the shaft of your immersion blender to help reduce air bubbles in the batter. “Burp” your immersion blender to remove any air trapped under it’s bell.
Pulse your immersion blender for about twenty seconds, stir. Pulse and stir and pulse and stir until the batter has reached a thin trace.
You will want to be careful about over mixing this one. Any time you are working with lots of saturated fats, your soap batter will reach trace a lot quicker.

When thin trace is reached we will move on to making our chocolate swirl. If you’d like to add any essential oils you can do that now. I left this soap bar unscented but rose, vanilla, peppermint, orange or lemon would smell amazing. Make sure your essential oils are skin safe.
Make Chocolate Swirl
Pour half of the soap batter into a separate bowl. Whisk in 1-2tbsp of sifted cocoa powder in one half of the soap batter. You can add more or less depending on the color you are looking for.

There are many methods for swirling your soap. Here, I chose to use the “in the pot swirl” method since it’s very simple and doesn’t require any other tools. Another easy option for swirling the soap is layering the colors and sticking your spatula into the soap and pulling it up and down along the length of the mold.
What ever you decide to do, each bar of soap will be unique and each batch a little different from the next. That’s part of the fun when making your own handmade soaps.
For the in the pot swirl method, pour the chocolate soap batter into the plain white base in batches. Pour a little in one spot and a little in another. You could pour the colored soap in only one spot or five or more. You could also swirl the soap gently with a fork or chopstick if you’d like. Experiment and have fun, there’s no right or wrong way to do this step.
Pouring the batter at different heights will also change the depth your colored soap reaches. Have fun experimenting with your soap creations.


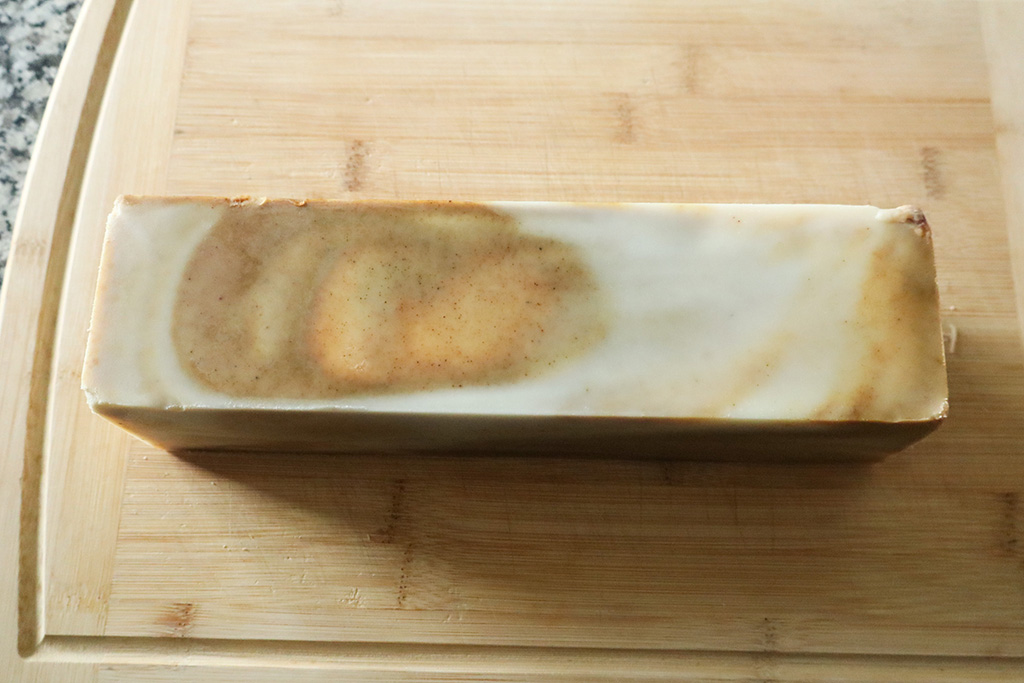
Here I poured the chocolate soap batter into six spots and gave it a little stir in the plain soap batter.
Pour soap batter into mold
With all the chocolate soap batter added back into the base, it’s time to pour the soap into the mold. Pour the soap batter into only one spot of the mold, allow gravity to spread out the batter evenly. Wiggle around the mold gently and lightly pound it on the counter to remove any air bubbles.

Cover your mold if you’d like it to gel, otherwise set it aside in a safe place to saponify for the next 24-48 hours.
After it’s rested for a good amount of time and hardened you can go ahead and unmold your soap loaf. Cut it into 1″ bars, each should weight between 4 and 5 oz at this point. Set the bars in a well ventilated area to cure for the next 4-6 weeks before use.

And that’s that! If you have any questions drop them into the comments below and I’ll try to help you out best I can.
Happy soaping! 😊

Chocolate Swirl Tallow Soap
Ingredients
Equipment
Method
- Before beginning make sure you can work distraction free for at least two hours. Work in a clean environment, if working in a kitchen put away all food and drinks. Tie back your hair if it's long and wear your safety equipment.
- In separate bowls weigh out all ingredients. Weigh the water in a heat proof glass measuring cup or stainless steel bowl. Weigh out the lye last.
- Add fat and oils (excluding essential oils if using) to a stainless steel bowl or pot. Set the oils on the stove to melt over low heat. Stir occasionally while the fat melts.
- Pour lye into the weighed out water, never the other way around. "Snow falls on the lake." Stir with a stainless steel fork or whisk until the lye is fully dissolved. The lye solution will get hot, do not inhale any fumes.
- Set aside in a safe place to cool.
- When the fat has completely melted, check the temperature of the oils and lye solution. We want our oils to be 140F or under and within ten degrees of the lye solution. If too hot, wait for the oils to cool for a few more minutes before checking the temps again.
- Once the temperatures are within our desired range pour the lye solution into the oils. To prevent too much bubbles, pour over the shaft of your immersion blender and burp your immersion blender before turning it on to release any air bubbles trapped under the bell.
- Pulse for 20-30 seconds and stir gently. Repeat until the batter reaches a thin trace, similar to the consistency of gravy. This can take 3-5 minutes.
- Pour half of your soap batter into a clean bowl/container. (Long spouted measuring cups work really well for this).
- Sift cocoa powder into the soap batter and whisk to combine. Pour chocolate soap into the plain soap base to make "spots". See post for reference photo's. You can gently swirl these spots or leave them as is.
- Pour soap into mold. Cover or simply set aside to saponify for the next 24 hours.
- Unmold soap and cut into one inch bars. Each will weigh between 4-5oz before curing.
- Store bars in well ventilated area to cure for the next 4-6 weeks before use.
This would smell amazing!! Thank you for sharing this recipe!
Ok I knew I needed to try this as soon as I’ve read the title! I’m sure it’ll smell as nice as it looks!
Love the oil combo!!