
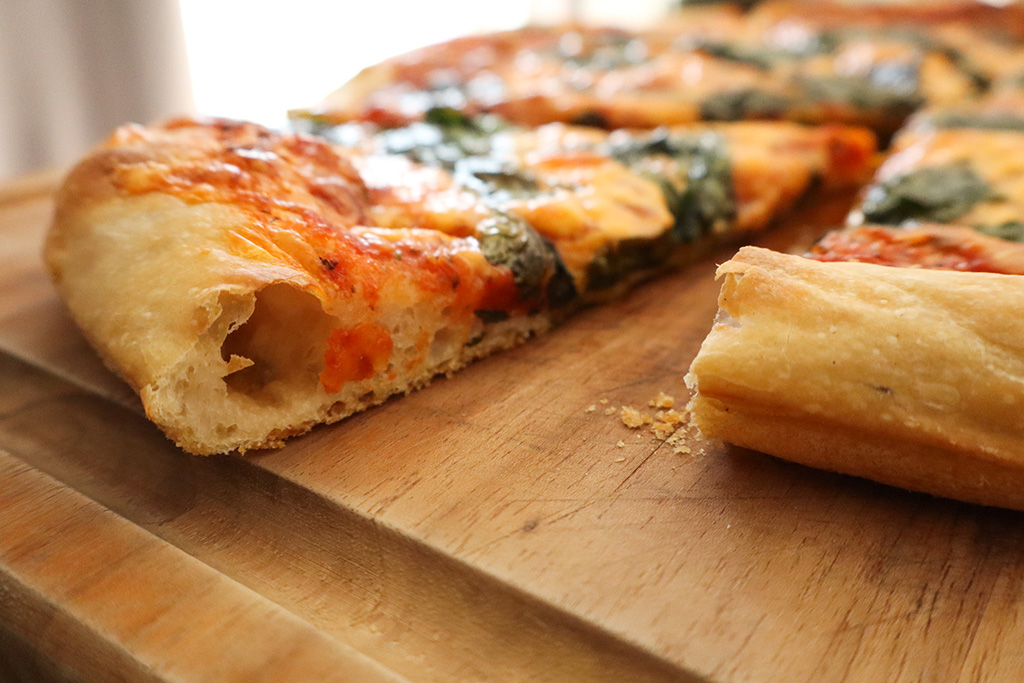
We love pizza in our home, but buying it can be a bit expensive, especially the good stuff. And making it can be time consuming and the crust just isn’t the same as the local pizzeria. Enter this super easy, simple cheap and quick(-ish, you’ll see what I mean in a bit) pizza dough recipe. This thin crust pizza dough recipe is sure to be a hit in your home.
This thin crust pizza dough recipe makes enough dough for two 14″ pizza’s. We make it in our cast iron skillet but a good pizza stone will also work. If you are working with a 12″ baking dish, you’ll have a bit more crust, but still thin and lightly crunchy 🤤
The other portion of dough makes great chewy breadsticks to pair with your homemade pizza. Or, make this delicious smore’s pizza. The filling is sweetened with date sugar, so you’re just making sure you’re getting all your fiber… definitely not indulging 😉
This post may contain affiliate links. As an Amazon Associate, I earn from qualifying purchases.
Ingredients for thin crust pizza dough
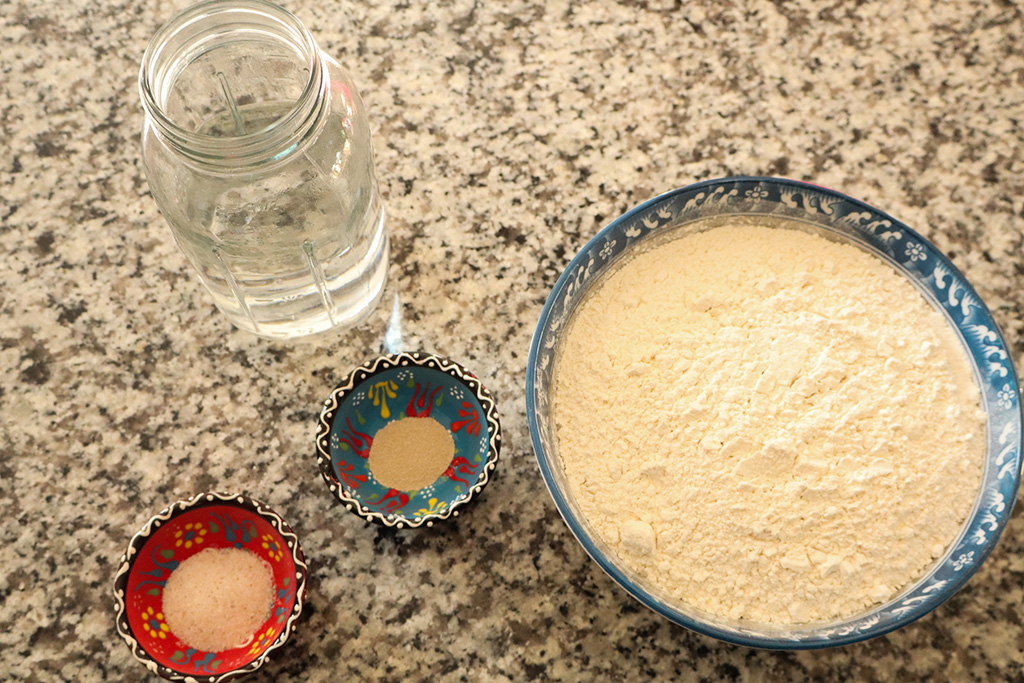
- Flour – all purpose, organic flour is all you need
- Yeast – just a bit. To make this dough extra flavorful and lazy friendly we will be fermenting our dough over a long period of time.
- Sea salt – we use unrefined mineral salt from Redmond’s.
- Water
How to make thin crust pizza dough
I recommend weighing out the flour and water for this recipe for consistent results. If you don’t have a kitchen scale this is the one I use. Otherwise, weigh out your flour by spooning it into your measuring cup and leveling the top. Do not pack the flour.
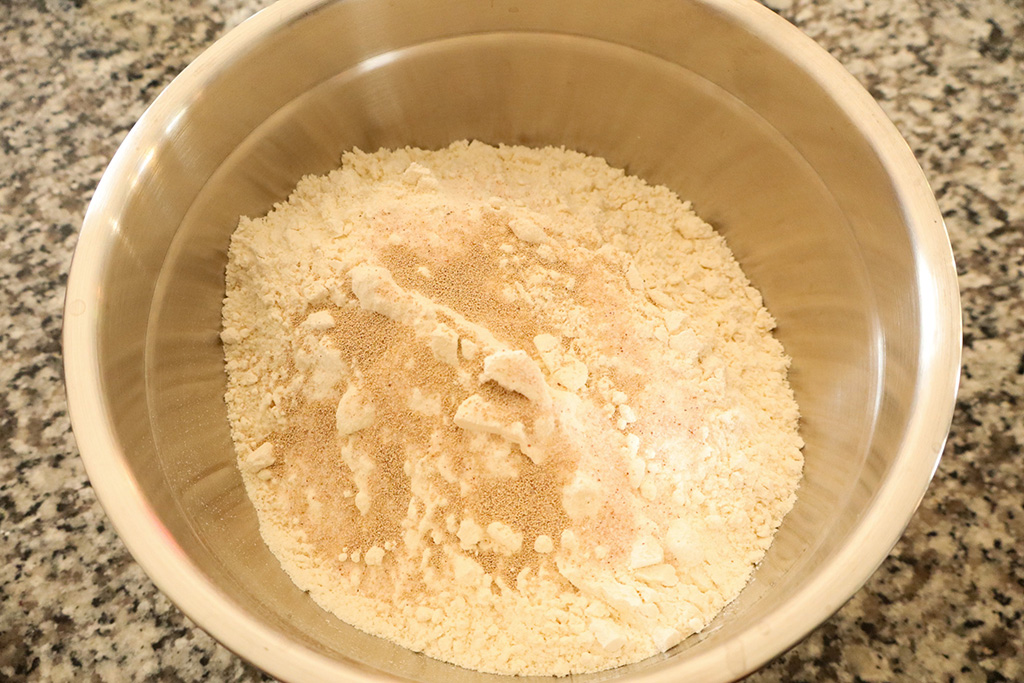
In a medium mixing bowl combine flour, salt and yeast. Stir to combine.
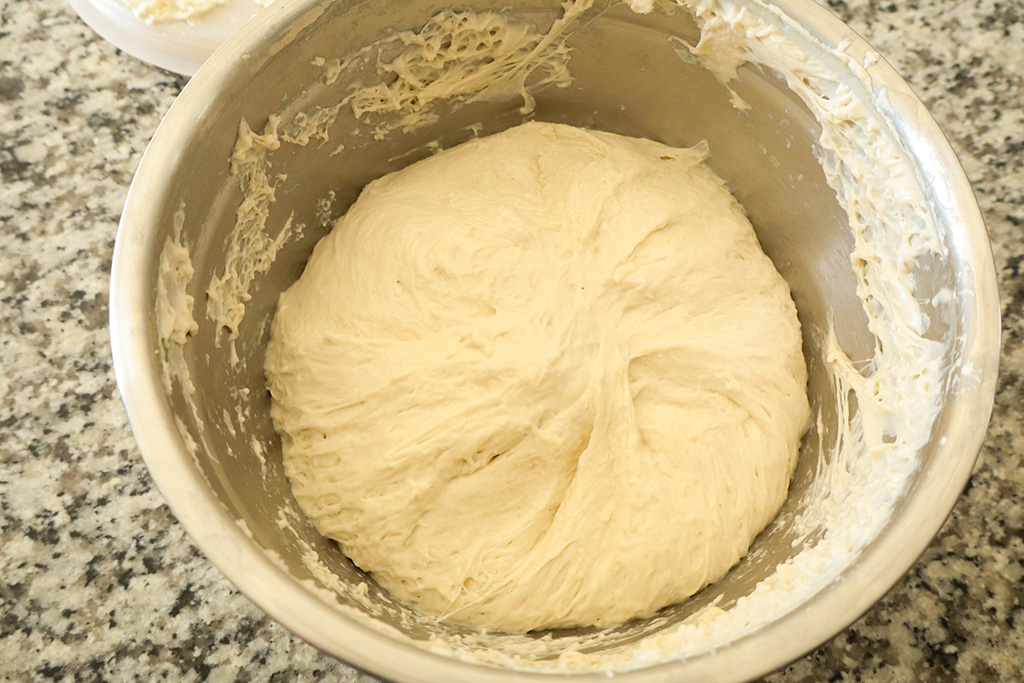
Then add in water and stir that in. Pop a lid on the bowl or cover it with a towel and set it aside for about eight hours or so. Then, you can move forward to dividing the dough and shaping your pizza or you can punch it down (stretch and fold it), pop it in the fridge and forget about it until you are ready to bake. Punching down as needed to keep it from bursting out of the bowl.

This seriously is some of the easiest dough you’ll ever make. When you are almost always holding a baby and you don’t have a stand mixer, having something you can put together one handed is always golden.
So… definitely the laziest pizza dough recipe you’ll see. As the dough is fermenting you can stretch and fold it if you desire, especially if it is starting to bulge out of the bowl, but otherwise, you don’t need to do anything extra if you don’t want to.
For the same day
If you’d to make the dough and eat pizza for dinner the same day, start the dough in the morning. Letting it ferment for at least eight hours will help develop the flavor better than a fast fermentation time.
Long ferment in the fridge
You can let your dough ferment in the fridge for up to a week before cooking it. When you are ready to bake it, remove the dough from the fridge and let it warm up to room temperature. If you are planning on pizza for dinner, take it out no later than lunch time. Once it’s warm, divide the dough and move on to shaping.
Shaping the thin pizza crust
Working on a floured surface, take your dough and gently knead it to shape into a ball. Press down the middle of the ball with your fist, creating a disc shape. The edges should be thicker than the middle by a little bit. Cover the dough and let it rest while you prepare your toppings and cast iron pan or pizza stone.
Tip!
This is a wet (high hydration) dough, to prevent sticking, wet your hands when working with the dough.
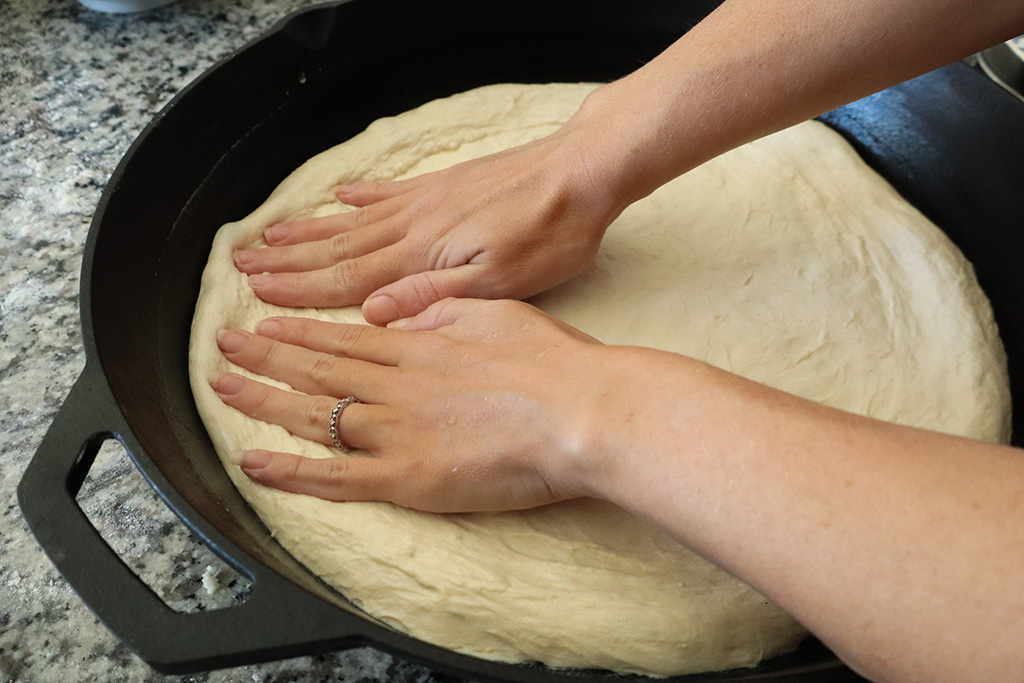
To shape the dough, wet or flour your hands and pick up the dough by the thick edges. Work your hands around the dough, letting gravity stretch the dough. Once it’s stretched several inches (about 6-8″ in diameter) place it into your greased cast iron or floured pizza stone.

Press the dough gently to stretch it out. Be patient with the dough, it may want to shrink back to a smaller size. Keep working it until it stays stretched out. Add your toppings to the dough and let it rest again while you preheat your oven.
Baking
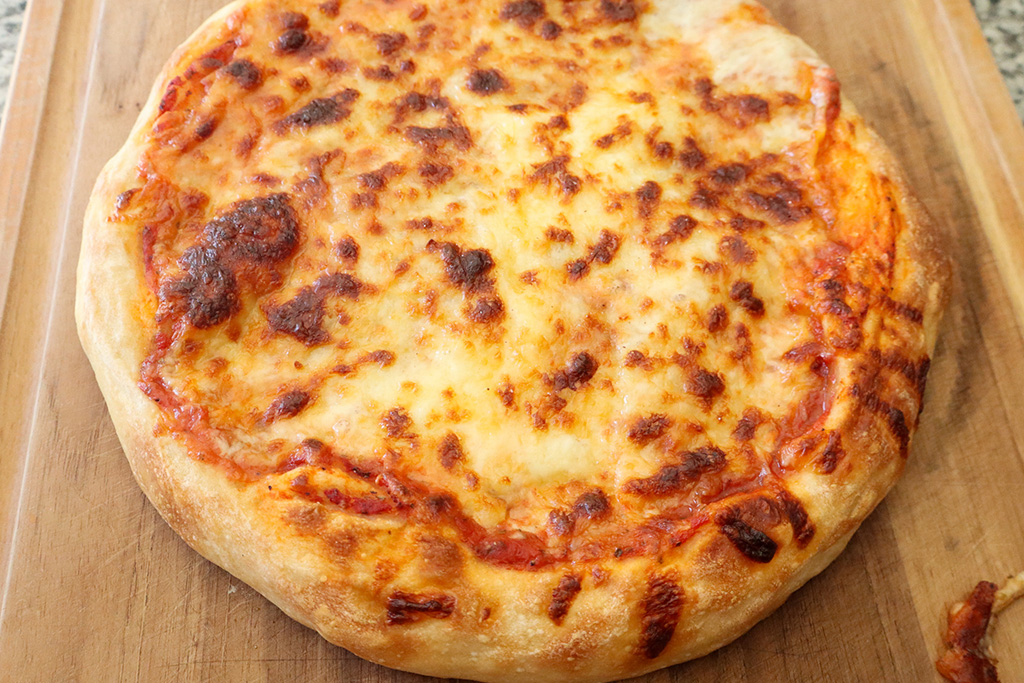
Preheat your oven to 500F. Bake your pizza for 20 minutes and then broil for a few more minutes to finish it off.
When broiling keep a close eye on the pizza. Broilers vary and can burn your pizza fast if you aren’t paying attention.
If you are using a cast iron pan, transfer the pizza to a cutting board before slicing into wedges. Enjoy warm! The crust is the crunchiest right after baking. As it sits, the juices from the toppings will soften the crust a bit. Still delicious and it happens with the fancy restaurant pizza’s, too, so don’t be discouraged. Just serve this one up fresh out of the oven.

Let me know if you give this thin crust pizza dough a try, I’d love to hear how it turned out for you in the comments below, and if you have any questions, feel free to pop them down below.
Happy baking! 😊
Thin Crust Pizza Dough
Ingredients
Equipment
Method
- Add flour, yeast and salt. Stir to incorporate.
- Add water and mix until all ingredients are fully combined.
- Cover and let rise for at least eight hours. For longer fermentation times, keep the dough in the fridge. The dough will stay good in the fridge for up to a week. During the rise time you can either totally forget about the dough, or stretch each side of the dough and pinch it into the middle every hour or so. Punch down the dough as needed to keep it from bulging out of the bowl.
- Grease or flour a pizza stone or cast iron pan. Set aside.
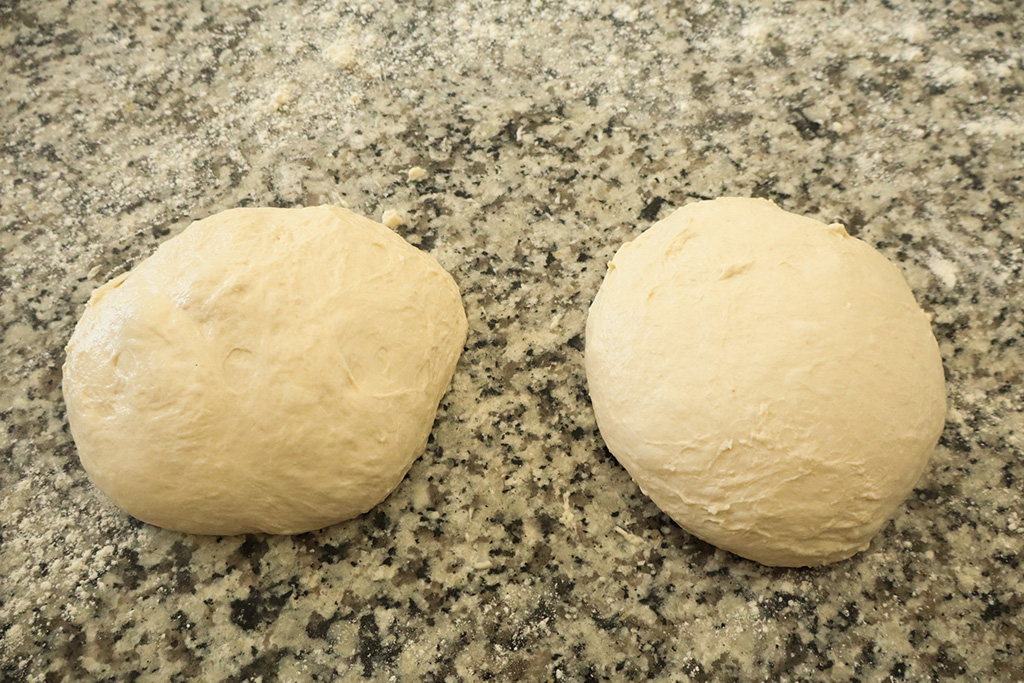
- Generously flour a clean work surface. Turn out dough onto the floured surface and gently knead it into a smooth ball.* Cut the dough in half. If not making two pizza's, save one half for another day by either freezing or storing in the fridge.
- Take remaining half and form it into a ball. Press down the middle to form a disc. Cover and allow the dough to rest while you prepare your toppings.
- Pick up the dough by the thick edges, letting gravity stretch the dough out for you. Move your hands along the edge of the dough going all around letting the dough stretch as it hangs down, until it's about 6-8" in diameter.
- Place the dough onto your prepared baking dish. Gently press the dough to stretch it out further on the pan until it reaches your desired size. Be patient as the dough may resist stretching at first.
- Add sauce, cheese and other toppings as desired, leaving a one inch rim for the crust. Let rest while you preheat your oven to 500F.
- Bake for 20 minutes, then broil for an addition two or three minutes, keeping a close eye on your pizza so it doesn't burn.
- Transfer to a cutting board and cut into slices. Serve while hot and enjoy 🙂
Always looking for an easy weeknight meal idea! This hit the spot!
I’m glad 😊